Sourdough Bread Explained: A Working Guide From a Hot, Humid Kitchen
- May 27
- 12 min read
Sourdough is wildly context-driven. A loaf that takes eight hours of bulk fermentation in a cool New York kitchen takes three in our Goa kitchen. The flour mix matters. The starter's age matters. The season matters. The humidity matters. Even the same recipe, baked by the same person, produces different results in the monsoon (28°C, 85% humidity) versus in winter (24°C, 50% humidity).
Most online sourdough guides ignore this. They give one timeline, one folding routine, and one fermentation length and present it as the truth. It is the truth for a kitchen at 22°C with a mature 100% bread-flour starter, which is almost unheard of outside northern Europe or coastal California.
This guide is written from our kitchen at The Vegan School in Goa, where ambient temperatures sit between 25–30°C for most of the year. We do three folds, not four. We use a mix of bread and whole-wheat flour, not pure bread flour. Our total bulk fermentation runs about four hours, not seven. And these numbers will shift again the moment you read them in a different kitchen.
What this guide gives you is the underlying principles — what each step does, how to read the dough, and how to translate our timing to yours.
Why Sourdough Is Context-Driven
Four variables determine almost everything about how a sourdough behaves:
Temperature. Sourdough microbes have a sweet spot around 22–28°C. Below 20°C, fermentation slows dramatically. Above 30°C, it accelerates so fast that over-fermentation becomes the main risk. Every 5°C shift in ambient temperature roughly halves or doubles the timeline.
Flour composition. Whole-grain flours ferment 30–40% faster than refined bread flour. They contain more enzymes, more nutrients for the microbes, and more surface area exposed to bacteria. A loaf with 30% whole wheat will be ready to shape well before a 100% bread flour version.
Starter maturity. A starter that has been alive for six months behaves nothing like one that's been alive for two weeks. Mature starters have a stable, dominant microbial community that ferments predictably. Young starters fluctuate — sometimes vigorous, sometimes sluggish — and produce inconsistent timing.
Humidity. Often overlooked. Higher ambient humidity slows surface drying of the dough, which matters during long autolyses and bench rests. In dry climates, doughs form skins; in humid climates, they stay supple. We adjust our hydration down slightly in monsoon because the flour itself holds more moisture from the air.
Once you know these four variables, the entire process becomes legible. A timing chart from a Brooklyn baker isn't wrong — it's just calibrated for their kitchen. You're recalibrating for yours.

The Science: Yeast and Lactic Acid Bacteria
A sourdough starter is a living culture of two microbe families — wild yeast and lactic acid bacteria — working in symbiosis.
Wild yeast (primarily Saccharomyces cerevisiae and related species) does the leavening. It metabolises flour sugars and produces carbon dioxide that lifts the dough. Yeast prefers slightly warmer temperatures (24–28°C) and produces small amounts of alcohol as a byproduct.
Lactic acid bacteria (primarily Lactobacillus species) do the flavour. They produce two acids: lactic acid (mild, dairy-like sourness) and acetic acid (sharper, vinegar-like sourness). The ratio between the two defines the character of any given sourdough.
The two organisms keep each other healthy. LAB lower the pH of the dough, creating an environment hostile to spoilage organisms but tolerable for yeast. Yeast breaks down complex starches that LAB can then use. They feed each other indefinitely.
Temperature shifts the balance. Cooler temperatures favour LAB activity relative to yeast — resulting in a more sour, slower-rising dough. Warmer temperatures favour yeast — faster rise, less sour. This is why a long cold proof produces tangier bread than the same dough fermented warm.
Building a Starter From Scratch
A new starter takes 14-20 days to become bake-ready, though the time varies considerably with climate. In Goa, we usually see a viable starter by day 15; in a cooler kitchen, it can take 25 or more.
The defining feature of starter-building is that the feeding schedule changes as the starter matures. A young starter eats slowly. A vigorous starter is constantly hungry. Most starter guides treat feeding as a fixed schedule — once a day, every day. That works in the early stages and fails in the later stages.
Here's what actually happens.
Days 1–2: Mix and wait. Combine 50g whole wheat flour with 50g room-temperature water in a glass jar. Stir until smooth. Cover loosely. Leave at room temperature. Stir once daily. No feeding yet. You're waiting for visible activity — small bubbles, slight smell, slight rise. By day 3 there's usually some signs of life.
Days 3–6: Once-daily feeding. Discard most of the starter, keeping only 50g. Feed what with 50g flour and 50g water. By the end of this phase, the starter should be rising noticeably between feedings. The smell shifts from neutral or sharp-vinegary to something more fruity, slightly yeasty.
Days 7–9: Twice-daily feeding. As activity builds, the starter rises faster and falls faster. Feeding once a day is no longer enough. Feed morning and evening. Use the same 1:1:1 ratio (equal parts starter, flour, water).
Days 10 and beyond: Three to five feedings a day at peak. A vigorous starter in a warm climate is genuinely hungry. It will rise to a peak in 4-5 hours and start collapsing if not fed. We feed our most active starters four times a day during this stage. The signal is the rise-and-fall cycle — if the starter has risen and is starting to sink back, it's asking for food.
By the end of this phase, the starter is mature. It rises predictably, smells balanced, passes the float test, and produces consistent loaves.
After it's established, move to once-a-day feeding at room temperature (we do this), or to weekly in the fridge, with a feeding the day before baking.
Maintaining an Established Starter
Once a starter is mature, the daily ritual simplifies:
Discard most of the existing starter (keep 50g)
Feed the remaining starter with equal parts flour and water by weight (typical: 50g starter + 50g flour + 50g water)
Stir until smooth
Cover loosely
Use within 4–8 hours when it has roughly doubled
The float test is the simplest check: drop a spoonful of starter in water. If it floats, it has enough CO₂ to leaven bread. If it sinks, wait another hour or two.
Our Recipe (Depending on the season)
A basic loaf for our kitchen:
350g bread flour
150g whole wheat flour (70/30 split — works well in our climate)
375g water (75% hydration — slightly higher because whole wheat absorbs more)
100g active starter (20%)
10g salt (2%)
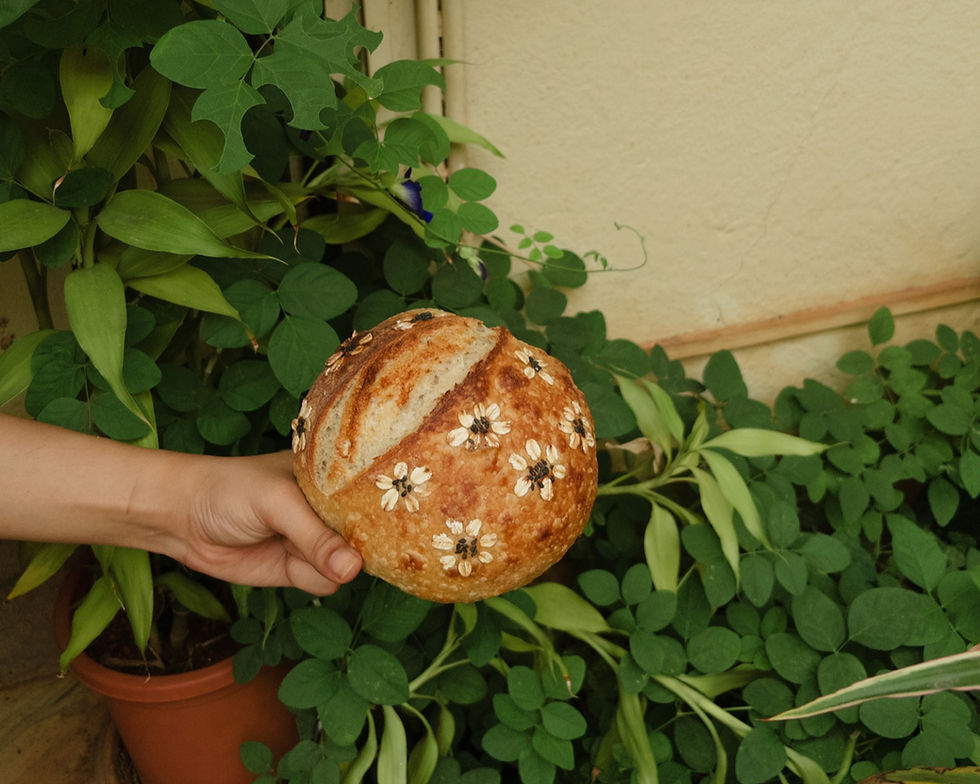
This produces one 750g boule.
A note on the flour mix: 100% bread flour produces an easier-to-handle dough but flat-tasting bread. 100% whole wheat ferments very fast and is structurally difficult. The 70/30 (or 80/20 for a milder loaf) is our default — bread flour provides the gluten structure, while whole wheat brings the flavour and microbial activity.
The Phases — Our Goa Timeline (25–28°C ambient)
The whole sequence from mixing to oven happens across roughly 4 hours of bulk fermentation, followed by overnight cold proof.
Phase 1: Autolyse (30–60 minutes)
Mix flour and water in a bowl until no dry flour remains. Cover. Rest 30–60 minutes.
What's happening: gluten begins forming on its own as the flour hydrates. Enzymes start breaking down starches. The dough that was shaggy becomes smoother and more cohesive. This is the step that does the work a stand mixer would do — autolyse is the home baker's friend.
Phase 2: Add starter and salt (5 minutes)
Add the 100g starter and 10g salt directly to the autolysed dough. Pinch the starter into the dough with wet fingers. Fold a few times to incorporate. Cover.
This is the moment fermentation officially starts.
Phase 3: Three folds (90 minutes)
We do three folds — not four. In our climate, with our flour mix and starter, three is enough to fully develop the gluten and trap gas.
First fold: 30 minutes after starter added
Second fold: 30 minutes later (60 min in)
Third fold: 30 minutes later (90 min in)
Stretch-and-fold technique: with wet hands, lift one side of the dough, stretch it up without tearing, fold it over the centre. Rotate the bowl 90°. Repeat four times — once from each "side." That's one fold session.
After the third fold, the dough is left alone for the remainder of bulk fermentation.
Phase 4: Final rest (90 minutes)
After the third fold, the dough rests undisturbed for another 90 minutes or so. By the end, it should:
Have risen visibly (50–70% increase in volume — not double)
Have a slightly domed top
Show small bubbles around the edges and on the surface
Feel jiggly when the bowl is tapped
Spring back slowly when poked (a quick spring-back means under-fermented; no spring-back means over-fermented)
Total bulk fermentation from starter-in to ready-to-shape: about 4 hours in our kitchen.
Phase 5: Pre-shape and bench rest (20–30 minutes)
Turn the dough onto a lightly floured surface. Use a bench scraper to fold the edges toward the centre and roll the dough into a loose round. Cover. Rest 20–30 minutes.
Phase 6: Final shape (5 minutes)
Flip the rested round so the seam side is up. Stretch the four corners outward. Fold each side to the centre. Starting from the top, roll the dough toward yourself, building tension as it rolls.
Flip the shaped loaf seam-side up into a banneton or a bowl lined with a heavily floured cotton cloth.
Phase 7: Cold proof (12–18 hours in the fridge)
Cover the banneton. Place in the refrigerator overnight.
What's happening: at 4°C, yeast activity slows to almost nothing, but LAB keep working slowly. The dough develops more sour, complex flavour without significantly over-rising. The cold also firms the dough, which makes scoring sharper the next day.
The Bake — Convection Oven With Steam
We bake in a regular home convection oven using the steel-bowl-and-water steam method. No Dutch oven required.
Setup:
Place a baking stone, baking steel, or a heavy upside-down sheet pan on the middle rack
Place an empty steel or cast-iron bowl on the lower rack
Turn convection OFF
Preheat to 250°C — fully preheat for 45–60 minutes after the oven reaches temperature, so the stone is heat-saturated
Just before baking, boil 250ml of water and have it ready.
Score the loaf:
Turn the cold dough out of the banneton onto a piece of parchment paper. Score the top with a sharp blade — one deep slash about 1cm deep at a 30-degree angle, running most of the loaf's length. The score creates a controlled point for oven spring expansion.
Load and steam:
Slide the parchment-and-loaf onto the hot stone
Pour the boiling water into the empty steel bowl — close the door immediately
Bake at 250°C, convection OFF, for 20 minutes
Phase 2 of the bake:
After 20 minutes:
Open the oven briefly to release the steam
Remove the steel bowl carefully (heavy gloves)
Drop the temperature to 220°C
Turn convection ON
Bake another 25–30 minutes
Total bake: 45–50 minutes across two temperatures.
The loaf is done when the crust is deeply browned (mahogany, not just golden), the bottom sounds hollow when tapped, and the internal temperature reaches 95–98°C (use an instant-read thermometer).
Cool fully on a wire rack for at least one hour before cutting. The interior is still cooking and setting during cool-down.

Oven Spring
Oven spring is the rapid rise in the first 10–15 minutes of baking. Three things drive it.
Yeast hyperactivity. As the dough heats from 5°C (cold proof) to 50°C, yeast activity ramps up dramatically before dying off around 60°C. In this window, the yeast produces a final massive burst of CO₂.
Gas expansion. All the CO₂ already trapped in the dough expands as it heats. Water in the dough turns to steam, contributing to the expansion pressure.
Crust softness. As long as the crust stays soft and elastic, the expanding dough lifts the entire loaf upward. The moment the crust hardens, expansion stops.
This is why the steam matters. Without it, the crust dries and hardens in 3–5 minutes, long before the yeast and gas expansion finish their work. The boiling water in the steel bowl creates enough humidity in the oven to delay crust formation for 15–20 minutes, exactly the window oven spring needs.
The score on top is the controlled expansion point. Without scoring, the loaf will tear at random — usually along the side or bottom. The deep, deliberate slash directs expansion upward and produces the characteristic "ear" of a well-baked sourdough.
How to Adjust This Timeline for Your Climate
Our 4-hour bulk works in a 25–28°C kitchen using our 70/30 whole-grain blend. For other climates and conditions:
18–20°C kitchen: 7–8 hours total bulk, possibly a fourth fold at the 120-minute mark
20–24°C kitchen: 5–6 hours total bulk, three folds spaced 45 min apart
24–28°C kitchen (our range): 3–4 hours total bulk, three folds at 30/60/90 min
28–32°C kitchen: 2.5–3 hours bulk, three folds at 20/40/60 min, watch carefully for over-proofing
Above 32°C: Consider bulk-fermenting in the fridge after one or two folds; the kitchen is too warm for full bulk at room temp
A practical adjustment for cooler climates: a more active starter or a warmer proofing spot (top of the fridge, near a window, inside the oven with just the light on) can compress the timeline without changing the recipe.
Troubleshooting in a Hot Climate
Dough collapses during bulk. Over-proofing. Likely caused by ambient warmer than expected, or starter more vigorous than usual. Shorten total bulk time, or move the dough to a cooler spot midway through.
The dough is too slack and won't hold its shape. Either over-fermented (skip the bench rest, shape immediately) or insufficient gluten development (add a fourth fold the next time).
Loaf has open holes near the top but a dense crumb below. Over-proofed, then shaped without enough tension. The gas escaped to the top before baking.
Loaf has no oven spring at all. Usually one of: oven not hot enough at the start (preheat for 60 min minimum), no steam (water didn't pour in or the steel bowl wasn't hot), or dough already overproofed before baking.
The crust is too pale. Either the steam phase ran too long, or convection wasn't turned on for the second phase. The dry heat with convection is what does the final colour work.
Sour, almost vinegar-sharp flavour. Either too long a cold proof, or too high a percentage of starter in the dough. Reduce one or the other.
Frequently Asked Questions
How does climate affect sourdough timing?
Climate determines everything. At our 25–28°C kitchen ambient in Goa, total bulk fermentation runs around 4 hours with three folds. At 22–24°C, the same loaf needs 5–6 hours. At 18–20°C, it stretches to 7–8 hours. Above 30°C, it can finish in 2–3 hours and over-fermentation becomes the main risk. The clock is a rough guide — the dough is the real signal.
How often do you feed a new sourdough starter?
In the first 3–4 days of building a starter, once a day is enough. By day 5–7, twice a day. By day 8–10, when the culture is genuinely strong, the starter gets hungry fast — 3 to 4 feeds a day in warm climates, sometimes 5. A starter that doubles in 4 hours after feeding and then sinks back is asking for more food. Feed until the rising-and-falling cycle stabilises at the rhythm you want for baking.
What flour mix works best for sourdough?
A blend of bread flour and whole wheat gives the best of both worlds — bread flour's gluten strength for structure and whole wheat's fermentation speed and flavour. Typical ratios: 70% bread flour to 30% whole wheat, or 80/20 for a milder loaf. 100% whole wheat ferments very quickly and is harder to handle. 100% bread flour is structurally easy but lacks depth.
How many folds does sourdough need?
Three is usually enough in a warm climate with a well-developed dough. Folds are performed at roughly 30, 60, and 90 minutes after the starter is added to manage gluten development. More folds are useful only if the dough still feels slack and underdeveloped after three, which can happen in cooler climates or with very high hydration.
Do I need a Dutch oven to bake sourdough?
No. A regular convection oven works fine with a simple steam setup. Place an empty steel bowl on a low rack during preheating, then pour boiling water into it the moment the loaf goes in. The steam keeps the crust soft enough for full oven spring during the first 20 minutes. After that, remove the bowl, drop the temperature, and finish baking in dry heat for colour and crust.
What is oven spring?
Oven spring is the rapid rise in the first 10–15 minutes of baking. The dough goes from 5°C (cold proof) to 50°C quickly; the yeast becomes hyperactive before dying off, and the trapped gases expand. Steam matters because it keeps the crust soft and elastic during this expansion — without steam, the crust hardens too quickly and traps the expanding dough.
Where Sourdough Takes You
The first loaf is rarely the best loaf. The first ten loaves are calibration — the bread teaches you what it needs in your specific kitchen. By the fifth or sixth loaf, the dough's signals become readable. By the tenth, the timing becomes intuitive, and you stop looking at the clock entirely.
The same starter and the same dough technique extend in several directions. Higher hydration (78–82%) produces a more open, airier crumb but is harder to handle. Adding seeds, olives, sun-dried tomatoes, or walnuts changes flavour without changing technique. The dough, scaled up, becomes focaccia. Scaled down and shaped differently, it becomes pizza. A long cold-ferment of the same dough produces ciabatta-style holes.
At The Vegan School, sourdough is taught across the fermentation module — students build their own starter from scratch and bake their first boule.
The microbes do most of the work. The baker manages timing, temperature, and the dough's signals. The rest follows.


Comments